Showing posts with label For the home. Show all posts

Sunday, November 12, 2017

Pram to pet bed!

This is an upcycle of a doll's pram to a pet bed! I chose a fluffy polar fleece blanket and a pillow for the mattress, so it can all be washed easily. It is cosy and soft.

Our wee man Fudge has chosen his bed. He didn't like the chair in our room, but chose the pram to sleep in at night. It can look a bit funny because sometimes he lays on his back with his feet in the air and snores his heart out.

Fudge can take considerable encouragement to get up in the morning. Just like a typical kid needs to be coaxed out of his pram bed, especially if it is raining or minus degrees outside!


Deer on the wall!

The design was originally for cardboard... but thin MDF works great too!


  • Use the template deer template  (http://teendiy.blogspot.co.nz)  and cut from MDF... a scroll saw saves time!
  • Pieces can be painted or covered in patterned paper. Scrapbooking background papers work well.
  • Add a couple of coats of matt vanish to protect the paper.

Sunday, March 27, 2016

Mihi inspired cushion - my story

I decided to create a personal story relating to my mihi and added extra elements such as paua to create a real treasure 'taonga'.

The cushion was divided into four squares and each square represents a connection to my whakapapa, whānau and mihi.

Felt was the main feature specification, as it doesn't fray. It is easy to cut and shape and can be used with the die cutting machine.

Fabric paint was used for all the painting including the stencilling and cotton buds to create the spotted kiwi.

Saturday, March 12, 2016

Rainbow Coloured Tie Dyeing T shirts

Wow this is a lot of fun... use sauce or mustard bottles and fill with your favourite dye colour. Twist your T into a wonderful spiral and tie with rubber bands and place over a sieve or similar on a bucket for dye to drip. 

Wrap in plastic for a few hours and wash on a gentle cycle with salt to help set the dye... and viola! Amazing tie dyed T shirts! Try dyeing some natural fibre textiles to create your own hats, bags and accessories!

Cover in glad wrap to allow the dye completely saturate the fibres of the cotton.

Use plenty of rubber bands


SaveSave

Wednesday, July 23, 2014

Fabric covered shelf

This shelf was picked up from a garage sale and I recovered it with fabric and clear vanish to protect it. I chose fabrics that co-ordinated and painted the edges of the shelf to match.


Shelf before...


Adding the fabric


The completed shelf


Repurposed dresser: saved from the garage sale

This is my first attempt at using 'chalk' paint. It did take 3 coats to cover this Rimu dresser. I purchased new handles and removed the mirror!


Saturday, October 12, 2013

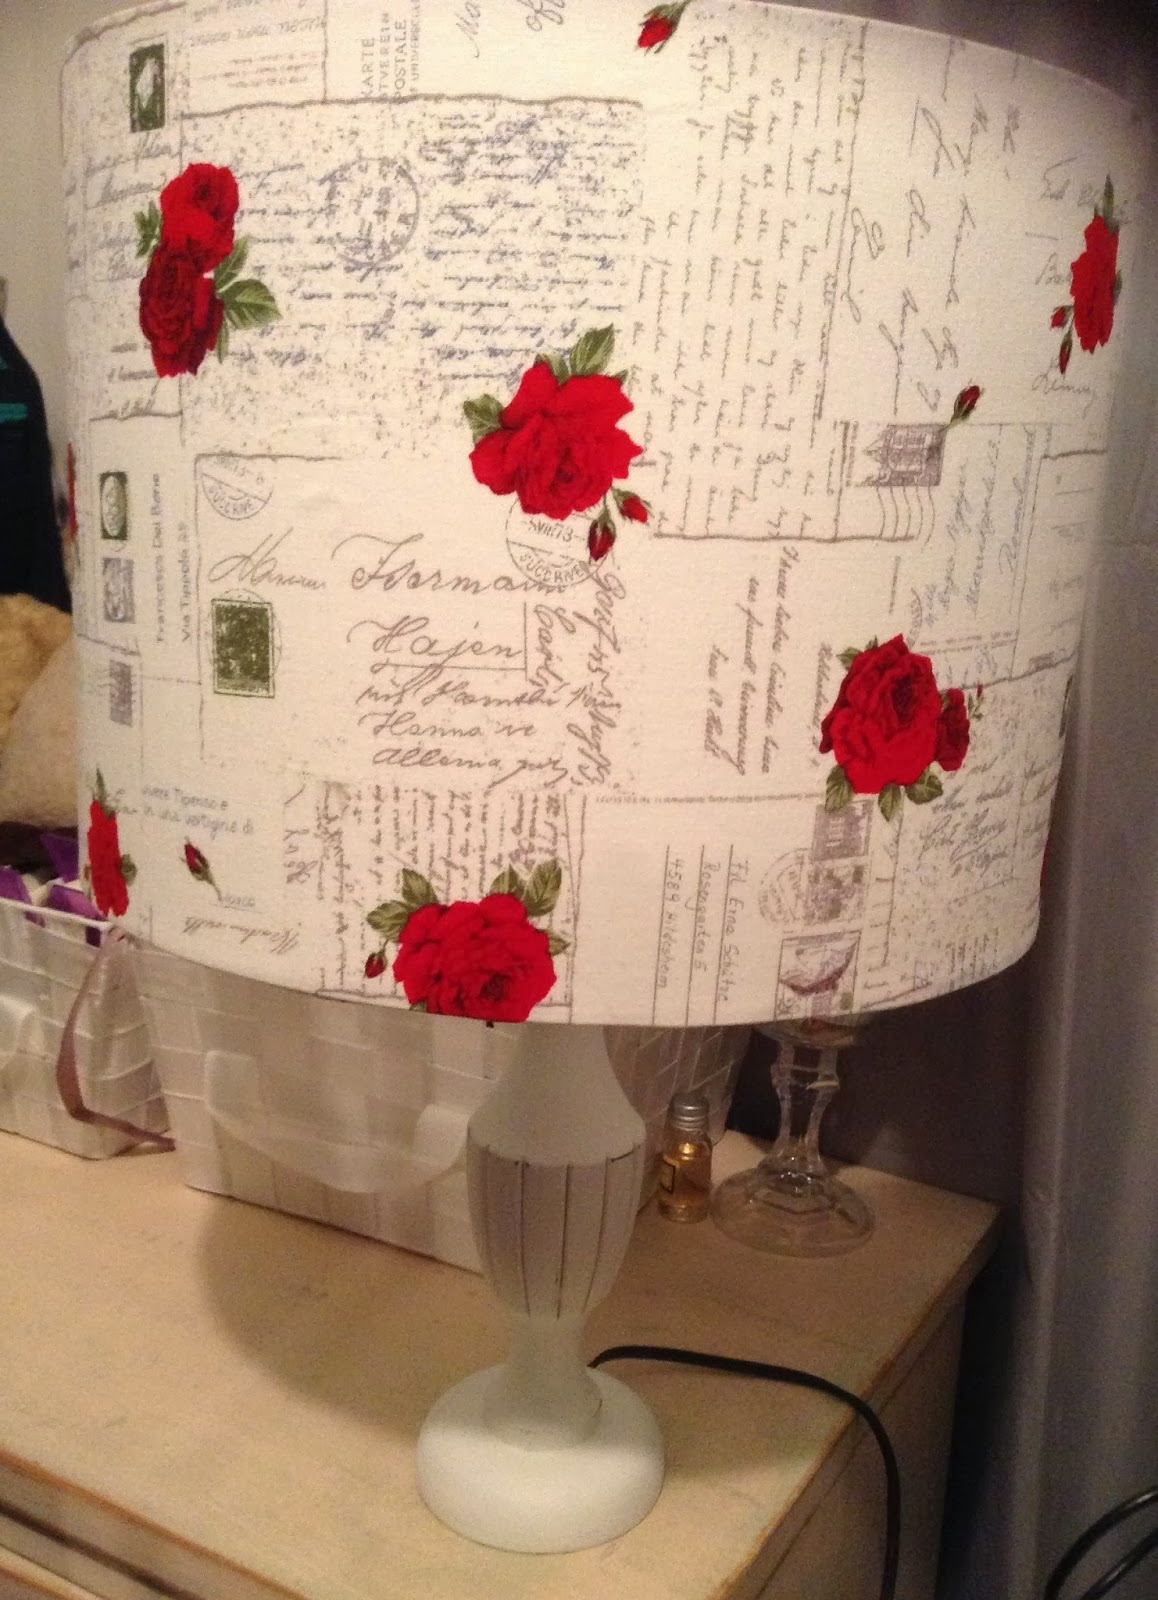
Lively Lampshade

At Make Café in Christchurch I attended a course to make this fabric covered lampshade. I purchased a wooden lamp base from a second hand store; painted and sanded it to give it the 'Shabby Chic' look.


Tuesday, March 12, 2013

Mannequin Makeover


 Before: 


After: I purchased a linen fabric and fitted by making darts along bust-line and centre front and back. The shoulders were shaped and added small darts to shape. Front and back were placed together and stitched leaving a gap down the side to turn through. The neck piece is separate and fitted last. The braid is hand sewn to cover raw edges around neck and sewn down the side seams to cover hand stitching. The base and top metal cap were spray painted in off white to compliment the fabric. I added a tassel as a finishing touch.

Monday, March 11, 2013

Couch Buddy - Patch and Recycled Materials


This cute teddy doubles as a decorative cushion. Pattern developed from a  Spotlight magazine pattern. The patches are made from a recycled grain bag, onion bag, a bonded supermarket bag, scraps of fabric, button and bonded applique.


Tuesday, February 26, 2013

Permanent Pens and Stenciling - Coaster


I used sellotape to secure the stencil to the fabric and traced the design with a pencil. I removed the stencil and used permanent pens to colour the lines.

I machined around the square of the design before fraying the edges, so they do not fray any further.

Very simple but effective!


Scrap Metal Art - Owl


This was a technology project that was undertaken at a school. Students were asked to collect scrap metal and design their own garden metal art. I decided to follow the process and created my own! I researched my idea of creating an owl. The design is largely created on what I could source and I had to adapt and change it to create my final outcome.
 I sourced springs, nails, cogs from a bike, a hinge, and a chimney flue cap. The fine springs at the top represent the feathers and have wire inside to shape them. The wings are shaped wire covered in chicken wire. It is mostly welded together. I popped riveted the springs at the top.

Wednesday, July 25, 2012

Magnetic Board

Magnetic board made with thin metal  cut with 2 holes drilled at top.
Use spray adhesive to attach scrapbook papers and add rubb ons. Make own magnets or purchase them. Attach wire at top of board and ribbons to embellish.

Box ottoman


Box ottoman covered in fabric from Femme de Brocante of Rangiora.

Thursday, March 8, 2012

My Favourite Recipes


Scrapbooking recipe book 6 x 6 " Add your favourite recipes and scrap